Communication between Taxpayers on GST Portal
This facility enables direct communication between you and other taxpayers on the GST portal by sending/receiving notifications. A taxpayer will receive an alert for the new notifications.
यह आपके और अन्य टैक्सपेयर के बीच जीएसटी पोर्टल पर सूचनाएं भेजने या प्राप्त करने की सुबिधा देता है | टैक्सपेयर को नई सूचनाओं के लिए अलर्ट प्राप्त होगा
You can send up to 100 notifications to a single GSTIN for a particular tax period.
आप किसी खास कर अवधि में एक GSTIN पर अधिकतम 100 सूचनाएं भेज सकते हैं
Suppose you purchased goods from XYZ and want to claim ITC of this, but XYZ has not uploaded his invoice in GSTR-1 yet. In such a case, you can send a notification to XYZ using this facility. Similarly you can send notification regarding missing documents or any shortcomings in the documents.
मान लीजिए आपने XYZ से सामान खरीदा है और आप इस पर ITC(इनपुट टैक्स क्रेडिट) का क्लेम लेना चाहते हैं, लेकिन XYZ ने अभी तक GSTR-1 में अपना इनवॉइस अपलोड नहीं किया है| ऐसे में आप इस सुविधा का उपयोग करके XYZ को सूचना (नोटिफिकेशन ) भेज सकते हैं
Step by step process :
Login to the GST Portal with valid credentials.
Navigate to Services > User services > Communication between taxpayers option.
इस प्रोसेस का तरीका
अपने आईडी और पासवर्ड के साथ जीएसटी पोर्टल पर लॉग इन करें |
सर्विसेज > यूजर सर्विसेज > कम्युनिकेशन बिटवीन टैक्सपेयरस ऑप्शन पर जायें ।
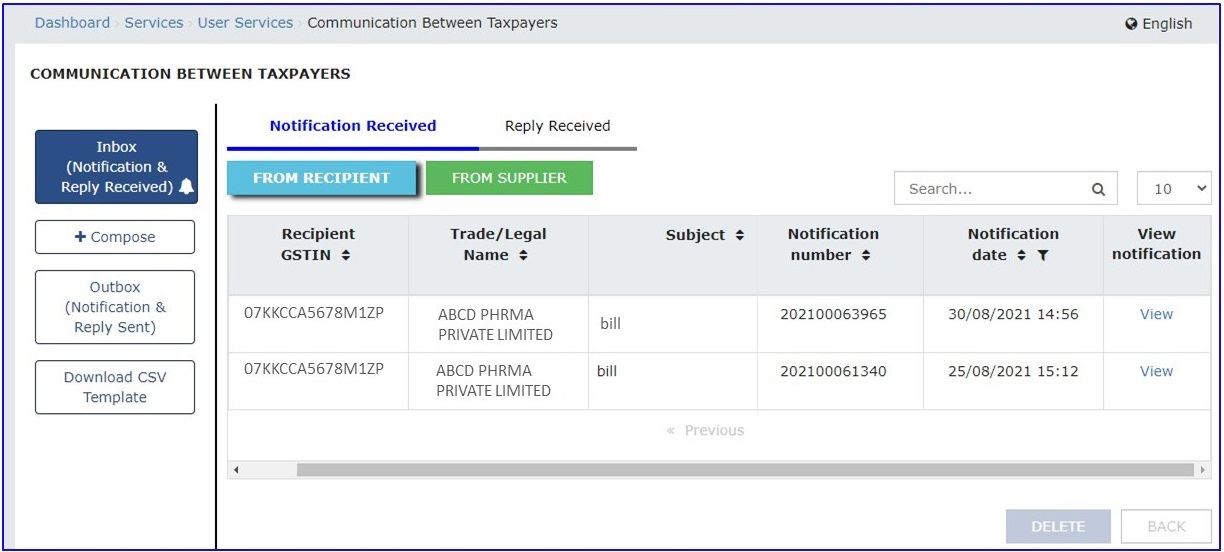
The 'Communication between taxpayers' page will appear. It has four tabs:
कम्युनिकेशन बिटवीन टैक्सपेयर्स पेज खुल जाएगा। इसमें चार टैब हैं:
Inbox- It shows any new notifications received and reply received from a Supplier or a Recipient.
इनबॉक्स- यह आपको नए प्राप्त किये गए नोटिफिकेशन्स दिखाता है और सप्लायर या कस्टमर से आये हुए जबाब को दिखता है
+Compose- Using this option, you can write and send a new notification to a Supplier or a Recipient.
+कम्पोज़ - इस ऑप्शन का उपयोग करके, आप सप्लायर या कस्टमर को नई नोटिफिकेशन लिखकर भेज सकते हैं।
Outbox- It shows notification or reply sent to a Supplier or a Recipient.
आउटबॉक्स- यह ऑप्शन आपके द्वारा सप्लायर या कस्टमर को भेजी गई नोटिफिकेशन दिखाता है।
Download CSV template- This will allow you to download CSV template through which you can upload the notifications in one go.
CSV टेम्प्लेट डाउनलोड- यह आपको CSV टेम्प्लेट डाउनलोड करने की अनुमति देगा जिसके माध्यम से आप एक बार में सारी नोटिफिकेशन अपलोड कर सकते हैं।
Send notification to a Supplier or a Recipient
सप्लायर या कस्टमर को नोटिफिकेशन भेजने की प्रक्रिया
Click on the +Compose option to send a new notification to a Supplier or a Recipient. 'Send new notification page' will appear.
सप्लायर या कस्टमर को नई सूचना भेजने के लिए +कम्पोज़ ऑप्शन पर क्लिक करें। नई नोटिफिकेशन पेज" खुल जाएगा।
If you want to send notification to a Supplier then select the Supplier option from the 'Notification To' drop-down list.
यदि आप किसी सप्लायर को सूचना भेजना चाहते हैं तो 'नोटिफिकेशन टू' ड्रॉप-डाउन लिस्ट में सप्लायर ऑप्शन को चुनें।
Now enter the GSTIN of the supplier In the 'Supplier GSTIN' field. 'Trade name/Legal name' will be auto-populated.
अब 'सप्लायर GSTIN'फ़ील्ड में सप्लायर GSTIN दर्ज करें। 'ट्रेड नाम /लीगल नाम ' अपने आप आ जाएगा।
Now, enter the subject up to 50 characters.
अब, सब्जेक्ट को 50 अक्षर तक लिखे ।
REMINDER FOR FILING- This option is applicable when you are sending a notification to a supplier. This option is not available for sending notifications to recipients. This functionality is optional.
फाइलिंग के लिए रिमाइंडर- यह ऑप्शन आप उस समय यूज़ करेंगे जब आपको किसी सप्लायर को नोटिफिकेशन भेजना हो । यह ऑप्शन सप्लायर के लिए नहीं है। यह ऑप्शनल है।
In the Financial Year drop-down and Return Period drop-down, select the year and then a month for which reminder has to be sent.
फाइनेंसियल ईयर ड्रॉप-डाउन और रिटर्न ड्रॉप-डाउन में, ईयर और फिर महीने का चयन करें जिसके लिए रिमाइंडर भेजा जाना है।
In the Form Type drop-down, either select GSTR-1 or GSTR-3B.
फॉर्म टाइप ड्रॉप-डाउन में, GSTR-1 या GSTR-3B चुनें।
Now Click the Plus icon.
अब डाक्यूमेंट डिटेल्स एंटर करने के लिए प्लस (+) पर क्लिक करें।
Now fill the details in 'Document Details' section.
अब "डॉक्यूमेंट डिटेल्स सेक्शन" में डिटेल्स भरें |
The first column in Document Details Section is 'Action Required'. There are several option in this, which are as follows :
डॉक्यूमेंट डिटेल्स सेक्शन में पहला कॉलम 'एक्शन रिकवार्ड' है | इसमें कई ऑप्शन जो इस प्रकार हैं :
● File Missing Document – Select this option to inform the Supplier to upload the missing documents.
फाइल मिसिंग डॉक्युमेंट - इस ऑप्शन को सेलेक्ट करके आप सप्लायर को मिसिंग डॉक्युमेंट के बारे में बता सकते हैं |
● Rejected-Amendment Required – To inform the Supplier to amend the document like debit note, credit note, invoice.
रिजेक्टेड - अमेंडमेंट रिक्वायर्ड - सप्लायर को डॉक्यूमेंट जैसे कि डेबिट नोट, क्रेडिट नोट, इनवॉइस में संशोधन (परिवर्तन) करने के लिए |
● Payment made – Use this option to inform the Supplier about the payment made against a document.
पेमेंट मेड - अगरआपने किसी इनवॉइस का पेमेंट किया है तो इस ऑप्शन का यूज़ कर के सप्लायर को पेमेंट की जानकारी दे सकते हैं |
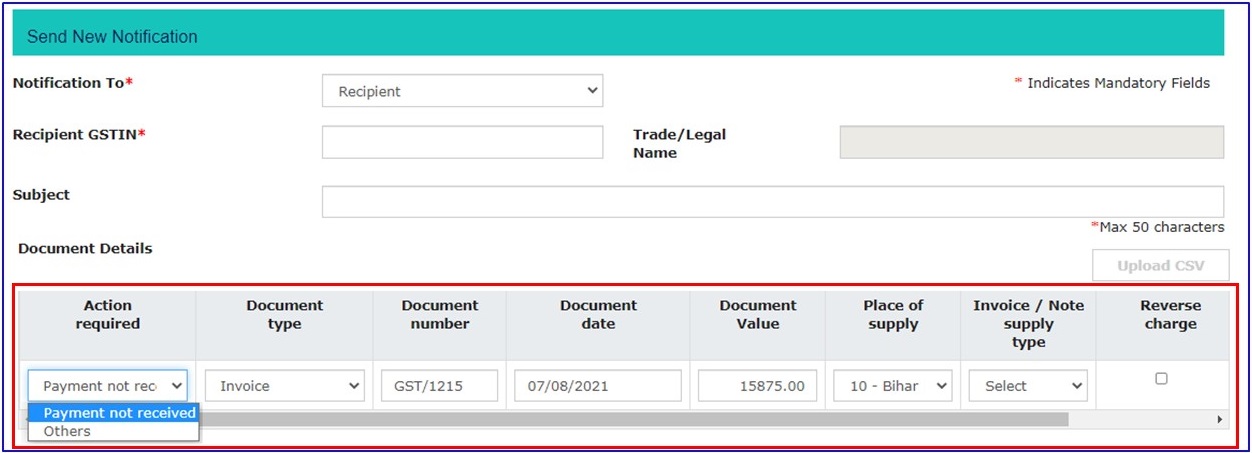
In case notification is sent to a Recipient by a supplier, then there will only one option of 'Payment not received' in 'Action Required field Drop-down.
यदि सप्लायर द्वारा रीसिपीअन्ट को सूचना भेजी जाती है, तो 'एक्शन रिक्वायर्ड फील्ड ड्रॉप-डाउन' में 'पेमेंट नॉट रिसीव' का केवल एक विकल्प होगा।
After selection the 'Action', fill all details of Document like number, date, value and then click on + sign in Add item column.
एक्शन सेलेक्ट करने के बाद, डॉक्युमेंट के सारे डिटेल जैसे कि नंबर , डेट, अमाउंट को भरना है | अब ऐड आइटम कॉलम में प्लस पर क्लिक करना है |

Now you have to fill GST% wise details of the above invoice like Rate(%), Taxable Value, Central tax(CGST), State tax(SGST) and Cess. Now click on + button on right side.
अब आपको इस इनवॉइस का GST% वाइज जैसे कि रेट%, टैक्सेबल अमाउंट, सेंट्रल टैक्स (CGST ), स्टेट टैक्स(SGST), सेस भरना है | अब दाहिने साइड में + बटन पर क्लिक कर देना है |
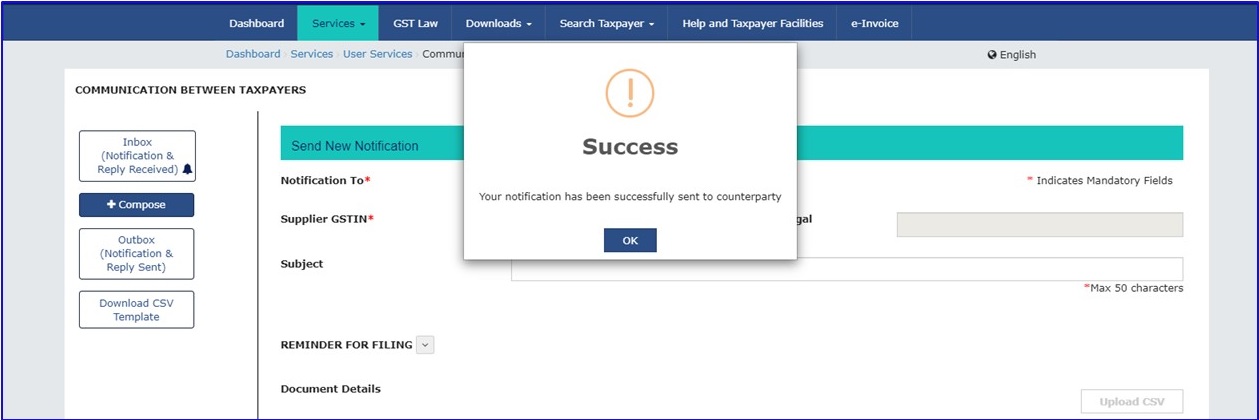
Now click on the Save button. The details will be saved under Added Document Details sections.
अब सेव बटन पर क्लिक करें। सारी डिटेल्स 'एडेड डॉक्युमेंट्स डिटेल्स' सेक्शन में सेव हो जाएँगी।

You can upload supporting documents by clicking on the Upload Attachment button, like purchase invoice copy etc. Finally, click on Send Button.
आप अपलोड अटैचमेंट बटन पर क्लिक करके सपोर्टिंग डॉक्युमेंट्स अपलोड कर सकते हैं , जैसे कि परचेज इनवॉइस की कॉपी इत्यादि । अब सेंड बटन पर क्लिक करें।
List of sent notifications
भेजी गई नोटिफिकेशन की सूची
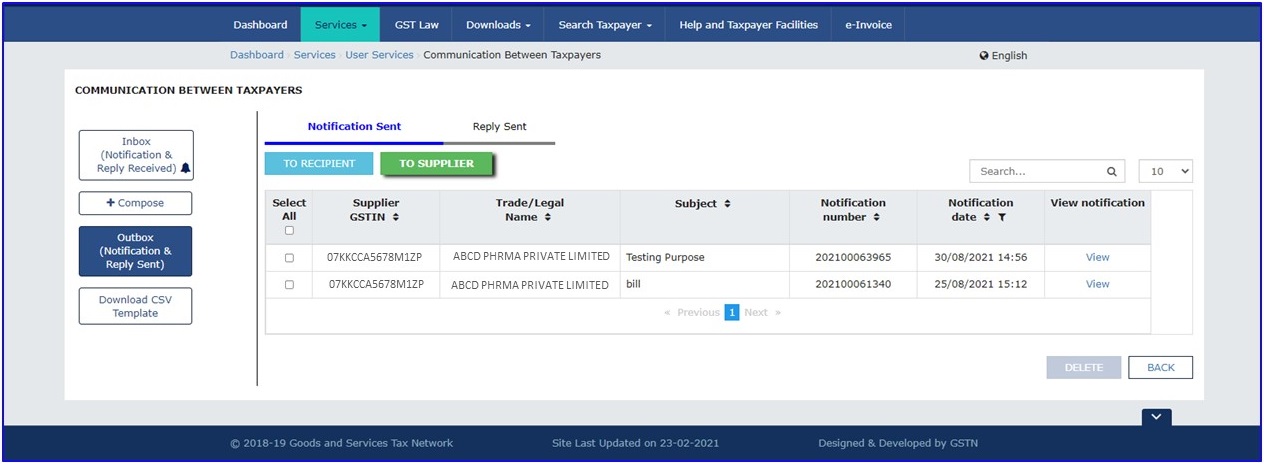
Click the Outbox (Notification & Reply Sent) (3rd) tab to see whether the notification has been sent. Select the TO RECIPIENT or TO SUPPLIER tab to view the notifications. Click the View link in View Notification column to see the details of that notification.
भेजी गई नोटिफिकेशन को देखने के लिए आउटबॉक्स (तीसरे) टैब पर क्लिक करें। मैसेज देखने के लिए रीसिपीअन्ट या सप्लायर का टैब चुनें। नोटिफिकेशन की डिटेल्स देखने के लिए व्यू नोटिफिकेशन कॉलम में व्यू लिंक पर क्लिक करें।
List of received notifications and take action
आए हुए नोटिफिकेशन की सूची और उस पर एक्शन लेना
Click the Inbox (Notification & Reply Received) (1st) tab to see the new notification received.
Under the Notification Received section, you can see the notification from a Supplier or a Recipient. Select the tab accordingly.
नई नोटिफिकेशन देखने के लिए (पहला ) टैब इनबॉक्स पर क्लिक करें।
नोटिफिकेशन रिसीव्ड सेक्शन में , अगर आप सप्लायर या रीसिपीअन्ट के नोटिफिकेशन देखना चाहते हैं तो उसके अनुसार टैब सेलेक्ट करे ।
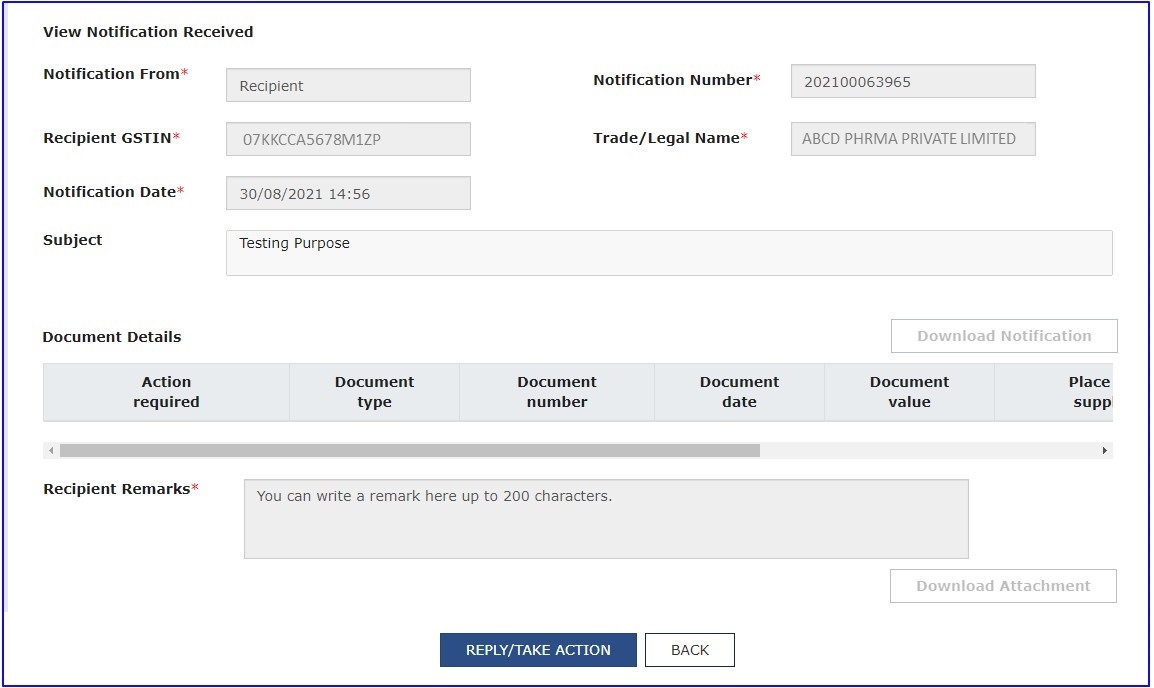
Click the View link in View Notification column to see the details of a particular notification.
किसी विशेष नोटिफिकेशन का डिटेल्स देखने के लिए व्यू नोटिफिकेशन कॉलम में व्यू लिंक पर क्लिक करें।
Click the REPLY/TAKE ACTION button to reply the notification.
नोटिफिकेशन का जवाब देने के लिए रिप्लाई/टेक एक्शन बटन पर क्लिक करें।
